Home Page Creation
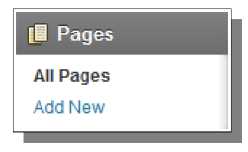
To start creating the home page of your site, click on Add New in the Pages menu:
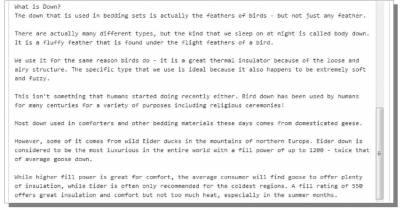
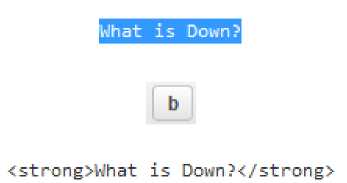
Next, provide a title for your page at the top of the page editor. For my home page, I usually just title it after my primary keyword phrase. After you enter the title, a URL will automatically be designated for the page based on your title (highlighted in yellow below): Notice how it used the words comforter and guide in the URL but not down. WordPress is actually recognizing down as a stop word, so it doesn't use it in the URL. A stop word is a word that typically does not have any specific meaning in a sentence. Down used as a directional indicator would be a stop word but this usage of down is not. If this was a normal page on my site, I might want to manually edit this URL to add the word down back on the beginning of it (be sure to split words with hyphens if you edit the URL). However, since this is going to be the home page of my site, I don't need to worry about the URL. Next, I simply need to add the content of my page into the large editor window below the title. For this tutorial, I have obviously had to go ahead and write my content ahead of time. Instead of writing it in the live class, I can actually talk to you about it here to explain it in more detail. At least for the home page of the site, I wanted to actually show you the content here so I can explain why I did what I did. To start, I have a brief introduction: Note the use of a number of relational words and then the use of my primary keyword phrase, down comforter guide, in the second paragraph. I try to include my target phrase in the first two paragraphs. This content is just meant as a brief introduction for the site visitors and also to satisfy search engines a bit. Next, I want to introduce the main category pages of the site and possibly sub-category pages too. For this tutorial, I have three main category pages and have listed five of their sub-pages. You don't have to list the sub-pages here, especially if you have a lot of them. However, it can be good to provide some easy navigation to the important pages of your site on the home page on way or another. I will actually be creating some custom HTML to use here to draw attention to this portion of my page, but for now, I just need to worry about getting the text in place that I want to use. Next, I continue with more content. For now, this will just be basic text, but that will change as this page progresses. The content that you use here could really be anything, as long as it is highly relational to your target keyword phrase and niche. Since down and specifically down comforters are my main topics on this site, I want to talk about them more. This gives me a chance to provide the user with some useful information so they can quickly identify this as a useful website, and it also allows me to earn some brownie points with search engines. To start, I talked about the down filler of these comforters, especially since this isn't really a main topic of any of the pages of my site. Next, I provide a bit of information that gets more specific towards the products I am targeting. This is very helpful information for consumers and geared towards earning their trust. Most industries have something about them that companies will often try to use to confuse or possibly deceive consumers, so this makes a great opportunity to bust through that confusion and gain the trust of your site visitors in the process. All of this additional content is a bit boring for now, but this is something I can change as the site progresses. It is really easy to simply go back through the site to add images, style text in various areas, or make other changes to the content to break up the large paragraphs of text. In general, you want to avoid large paragraphs - no more than a couple of lines of text all together. This helps with readability of your content, which is a lot more important than you might think. I can highlight portions of text in my content and use the WordPress toolbar buttons at the top of the editor to easily add some basic styling to my text. For example, if I highlight “What is Down?” and click on the “b” button in the toolbar, it will wrap that text in HTML strong tags (which will cause the text to show in bold text).
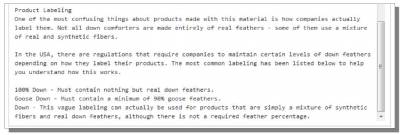
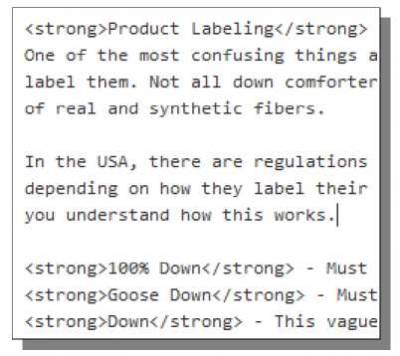
I am also going to do the same for other text at the bottom of the page: Product Labeling, 100% Down, Goose Down, and Down. This is what that part of the content looks like after I am done: The three down phrases that I changed at the bottom aren't really sentences - they're content that I wrote to be used in an HTML list. This can be easily done with WordPress buttons in the editor toolbar. First, I want to select all of my list content: Next, I want to click on the “ul” button in the editor toolbar:
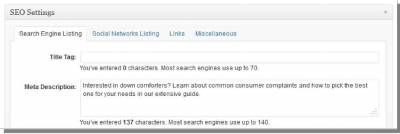
This wraps my highlighted text in “ul” HTML tags, which designates this as a list. Now I need to select each row in the list to designate it as a list item. You can see the first row selected below: Now if I click on the “li” button, it will wrap “li” HTML tabs around the highlighted text. Continue to do this for each row (the last row of the list actually occupies three lines of text). Here is what this content looks like after I am done: Notice the three <li> tags at the beginning of each row in the list. I now want to add some custom CSS code to two of these three tags (the first two). At the end of the top two opening “li” tags (right before the closing greater than symbol), I want to add a blank space and then this HTML/CSS code: style=”margin-bottom :6px;” This is how my code looks now: Here is what that looks like on the live site: As you can see, this is much clearer, easier to understand and more visually appealing than it would have been if I just wrote another paragraph here. SEO SettingsBelow the page editor window, you'll find the SEO Settings box. For now, I am going to go ahead and set a description for my home page. This description can potentially be used by search engines to show up in their search results, so we want this to quickly summarize the site in an appealing way that will help to increase the click through rate on our search result (which can also help to improve your rankings over time because Google considers results that get clicked on more often to be more relevant). Here is what I have come up with for my home page meta description: Read through that description a few times and really think about it for a minute. Can you see what I am doing here? I'm accomplishing a few goals with this short bit of text:
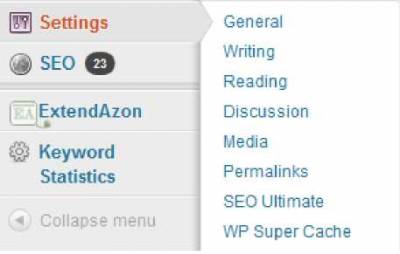
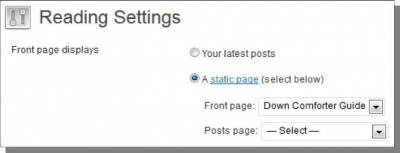
Weaver II OptionsBelow the SEO Settings, you will find the Weaver II Options. Here I want to select the checkboxes for Hide Page Title and Hide Info Bar. I also want to select the No sidebars options from the dropdown for Select Sidebar Layout. The picture below shows what these settings look like when I am done: Set Home PageI have more to do on this page, but for now, I am going to go ahead and publish it (blue button in the upper-right corner of the page editor). I will be revisiting this page to do more work later in this class and again before site construction is complete. The last thing that I need to do before I proceed is to actually set this page as the home page for my site. First, click on Reading in the Settings admin menu: At the top of the Reading Settings page, you'll see a setting called Front page displays. On the right, you'll see two circles, with the top one selected. Click on the second circle (A static page) to select it and deselect the first. Now the drop-down boxes below the second circle are available to be used. The first drop-down box, for Front page, is the one you want. Just select the page you created. This designates the custom page we created as the home page of the site instead of using the standard blog-style listing of recent posts on the site. © Site Construction 1/2 >>> Back to TABLE OF CONTENTS <<< | |
| Views: 628 | |
| Total comments: 0 | |
