Google Plus
Google has their own social network, Google Plus. Although it can be a good way to connect with others and build a network of friends and even site visitors, just like Facebook, I actually use it primarily for the search ranking benefits that it can offer. In particular, I want to be able to get my search results to show up with a picture of me next to them, which can drastically help to increase click through rates. While signed into your Google account from other steps, visit http://plus.google.com/
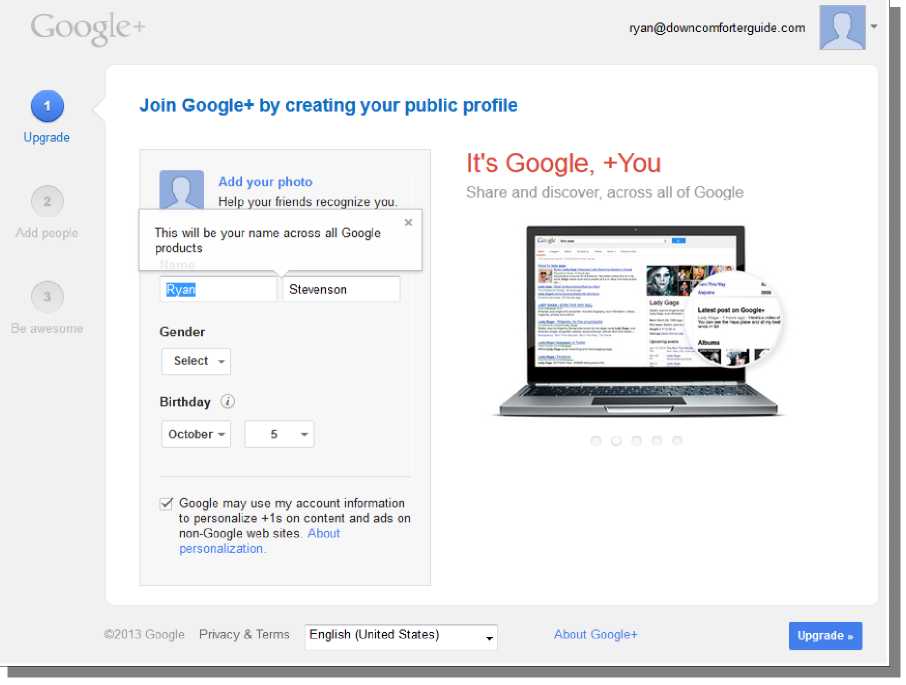
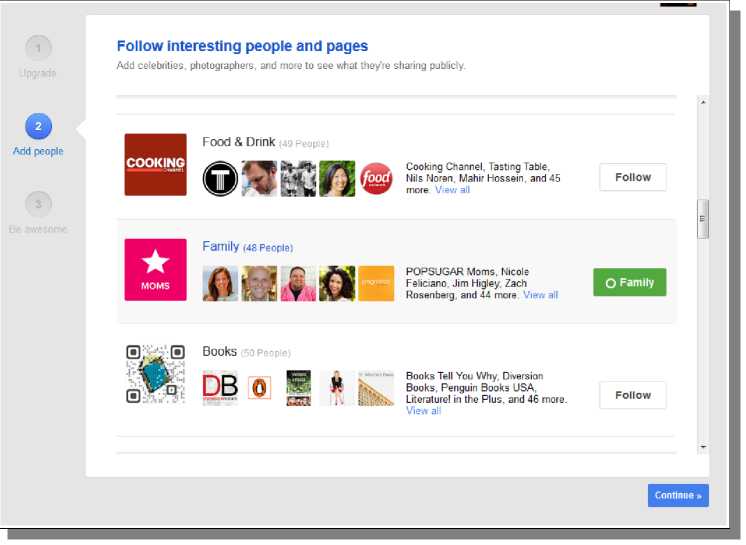
Proceed through the creation of your account. In the first step, you just need to provide your name, gender and birthday. The second step involves adding people to your account. You do not necessarily have to do this step though. Instead of adding people you know in the first part of this step, you can actually skip it and then add people/companies that you don't know that are relational to your niche to get in their circles. I added the family category to my circle, since this looks to be the most relational and would also likely have my target consumer in it already.
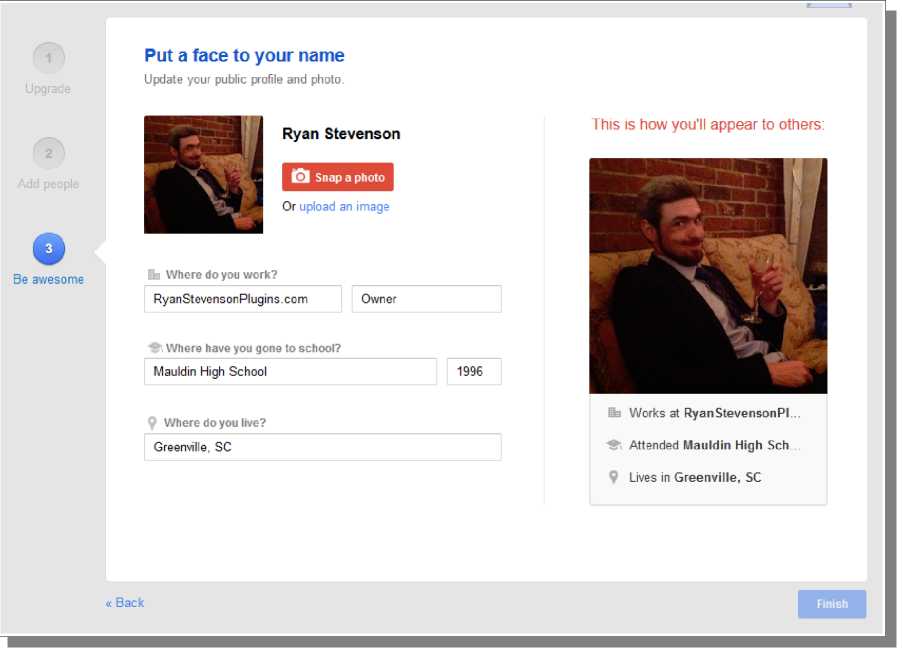
In the third step, you need to upload a picture of yourself. I know some people may be paranoid about doing this, but it really isn't that big of a deal - create a fake name and profile, if you must. However, it can be good to use your real name/picture to set up a real profile that you could actually use for all of your Amazon sites.
Once you are finished with creating your profile, click on the Finish button in the bottom-right. Now that you are in Google+, visit the About link at the top of the page.
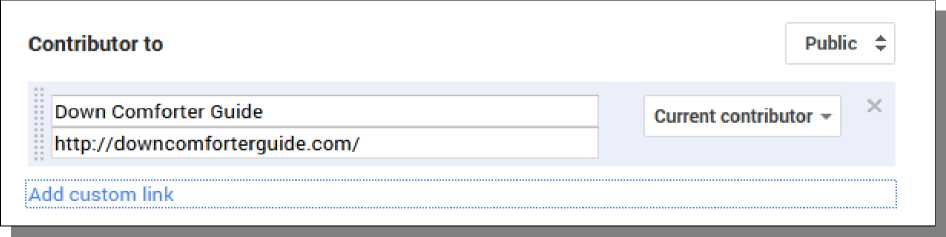
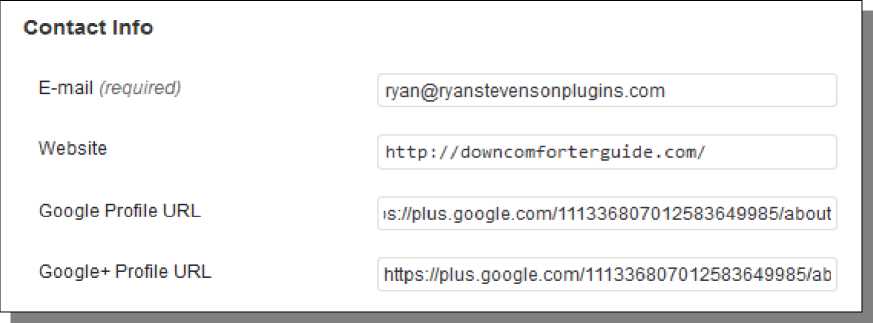
You should do your best to provide as much information here as possible - Google likes completed profiles. One particular thing that you must do is scroll down and look for the Links section on the page. Click the Edit link at the bottom.
Here, you can connect other accounts like Facebook or YouTube to your Google+ account. Assuming you have relevant accounts with these other services, add them here (or come back and add them when you do).
Also add your website to the contributor list, as seen below:
Now, take note of the URL of this page - everything up through the word about. Select and copy it.
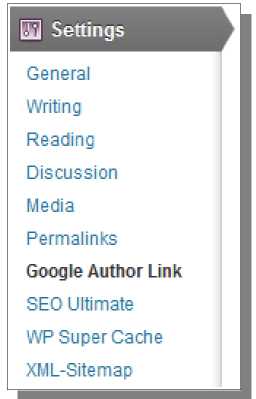
Now that we're done with Google Plus, we need to integrate this into our WordPress site. In particular, we want to set up Google Authorship so that our Google Plus profile is associated with the content we have created on our site. This is what allows that information to be shown in search results, although doing this does not guarantee that will happen (but it is required to make it possible). On the WordPress site, search for, install and activate a plugin called Google Author Link. Now go to Users -> Your Profile.
On the profile page, provide the your Google Profile URL and Google+ Profile URL (both the same -the URL you just copied) and save the changes.
Now go to Settings -> Google Author Link.
On this page, select your user profile in the drop-down box under Home page user profile, and then save the changes.
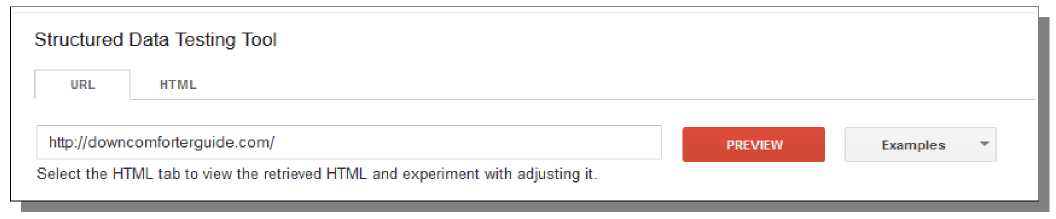
Once this is done, we need to run a test to ensure this is setup properly. Under Test the setup, look for the text link that says Rich Snippets Testing Tool. Click it.
This actually takes us to Google Webmaster Tools. Just enter your home page URL in the text box at the top, and click the Preview button.
You should now see your website search result preview with your name and profile picture, like it might show up in the search results. Look for the part that says Authorship Testing Result - as long as it says Authorship is working for this webpage in green text, you are all set.
© Google & YouTube Marketing >>> Back to TABLE OF CONTENTS <<< | |
| Views: 474 | |


| Total comments: 0 | |