Facebook Group Creation
Another great way to build a following is with the use of Facebook groups. You can actually visit existing groups for a relational subject and make useful posts to try to attract users to your own page/group. However, the main purpose of this chapter is to teach you how to get started with creating your own group. The main point of a group is to allow your followers a way to interact with you on a more personal level and even interact with other fans of yours. A group will require personal work from you to get it started and popular, but it can actually become fairly self-maintaining once it reaches a tipping point (the member count can vary depending on their activity and sharing level). From your Facebook Home page, look for Groups in the left-hand menu. Then click on Create Group. This opens up a window for you to name your group, add members, and set its Privacy. You can name your group after your website or go for a more general name to target your niche/keywords. I try to get keep it relevant to my niche but will often change up the name slightly. I've gone with Down Comforter Lovers for this group to make it more inviting to those looking to chat instead of coming across as a business. You will need to add at least one member to a group to create it. This is where it can be handy to have friends on your Facebook account already. I always change the group Privacy to Open for these groups because I want them to be easy to find and enticing to join to get in on the conversation.
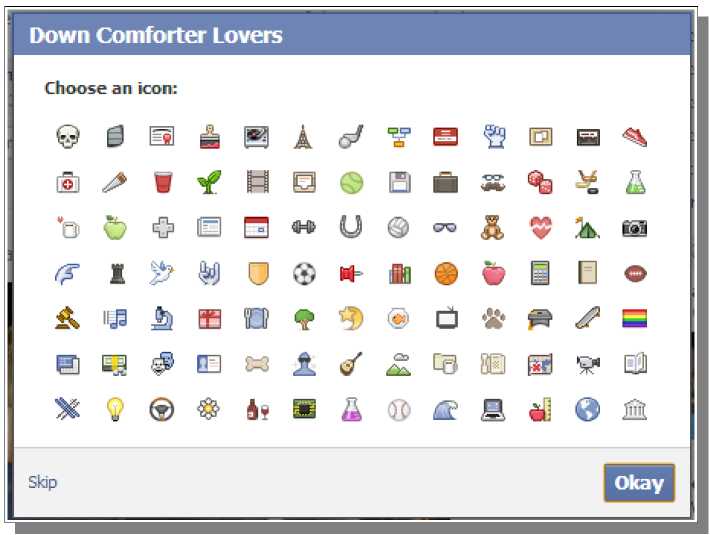
When you are finished, just click the Create button to proceed. Next, choose an icon for your group. This is used when people see a link to your group in the left-hand menu in Facebook, among other places.
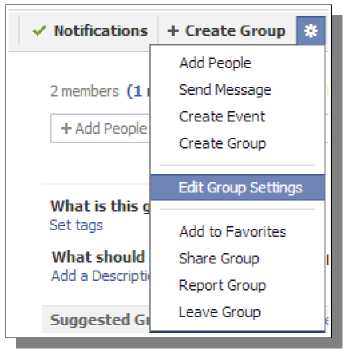
If you can find an icon that somewhat relates to your niche/products, go for that. Otherwise, just choose something you like but try not to make the icon misleading for your niche just so it isn't confusing to others. I've decided to pick the moon and star for my icon (since people sleep with down comforters at night and there isn't a bed or home icon). Once this step is done, the group is created! Although you could just go from here and start making posts in the group, there are some additional settings that you will want to take care of first. Click Edit Group Settings under the gear icon in the top-right of the group page:
A number of settings on this page need to be setup initially and others may be settings that some of you may be wondering about.
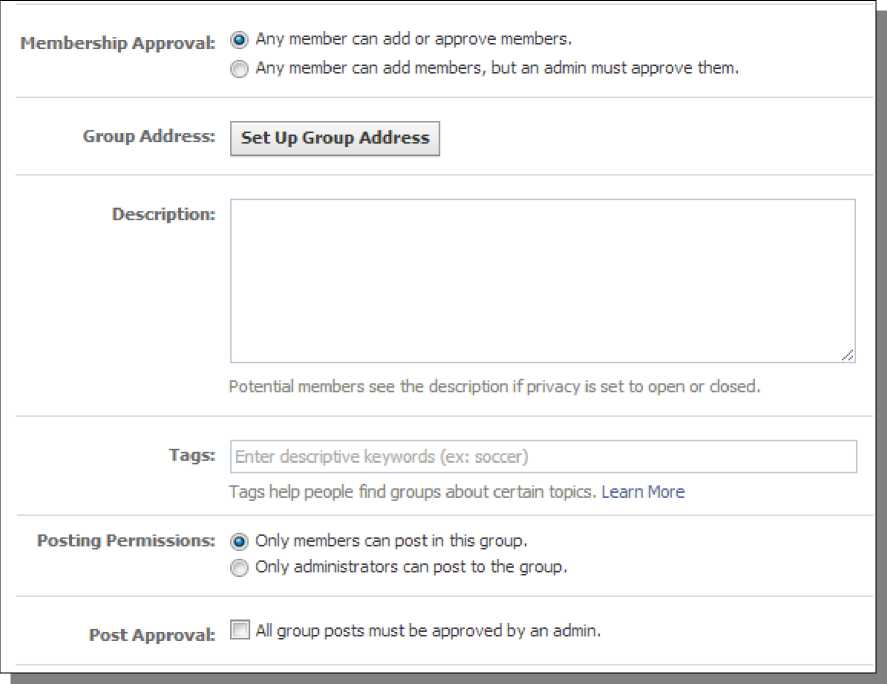
First, the membership approval. You can leave this set as the default, as you see above, or change it to force admin approval by you to join the group. The first can help newcomers engage in your group faster but may need to be disabled if you encounter spam problems frequently. Next, set a Group Address. This is the URL people will use to get to your group. It is just a number by default, so setting it to real words can help people find it on Facebook and search engines easier. This can just be set to the name of the group as long as it contains the keywords you want to target. The Description is shown on the group page, so this is a good place to briefly talk about the group or introduce people to it (don't give rules here). Next, enter keywords for Tags. These will be for Facebook Interests, so target anything that may be of interest to people that you would want to join your group. The last two settings here can be used for additional control, although I just leave these set to their default values. Save your changes when you are finished with your settings. If you would like, you can add a group photo at the top by hovering over the top-right corner. Click on the icon that appears and then click on Upload Photo. You can then reposition the picture you upload, if it isn't the right size.
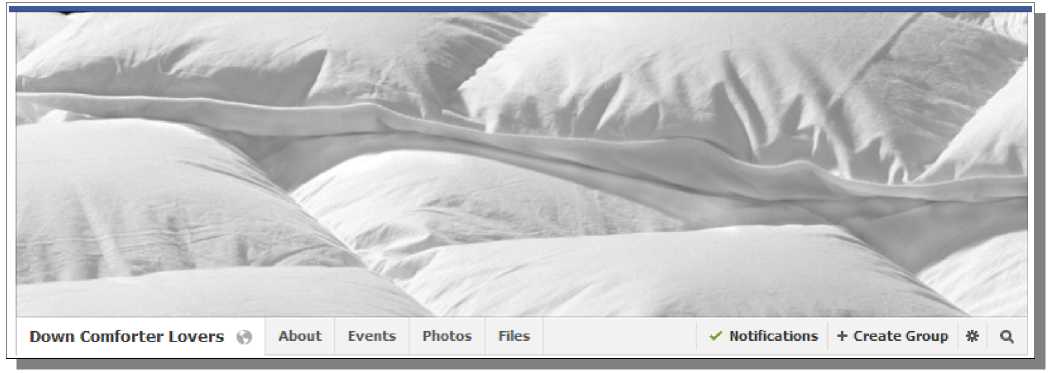
When you are done with the Group Photo, it will show up at the top of the group, like this:
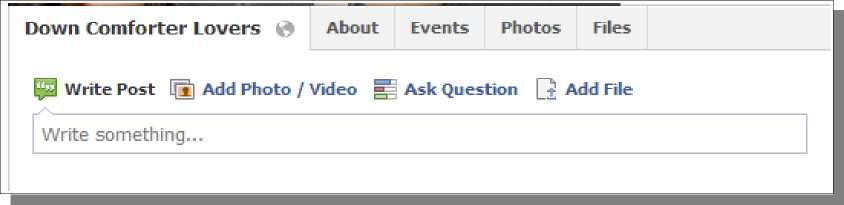
Beyond that, the rest is just about bringing in new group members and interacting with them by making posts using this post bar (you can also post videos, pictures, ask questions, or add files to download here as well).
To bring in new members, simply promote the group URL provided on the settings page (after you provide the Group Address). You can easily create a link to it from your website or your Facebook Page. Facebook will also attract new members for you based on the name, interests you selected as tags, and what people search for on Facebook. © Facebook Marketing >>> Back to TABLE OF CONTENTS <<< | |
| Views: 512 | |

| Total comments: 0 | |