Facebook Fan Page Creation
Facebook has become too large to ignore these days. Whether you're building a small Amazon affiliate site or running a large corporation, it can be well worth the effort to establish a presence on Facebook. The easiest way to begin doing this is to create a Facebook Page. A lot of the other Facebook tactics I'll discuss can actually be done without a Facebook Page, but there are some advantages to having one. The biggest advantage actually comes with advertising on Facebook, which will be discussed in more detail later in this guide, but it can help you to save money with your advertising and gain more exposure at the same time. For now, we will go ahead and get started by creating our Facebook Page. First, I recommend using Google Chrome for this Facebook class. I actually use Firefox as my primary browser, but there are a few particular things that I do on Facebook that are not possible or are much more difficult to do with Firefox than with Chrome. These things are actually just for those that want to advertise on Facebook, which I will cover more in that chapter, so some of you may not need to worry about this particular point. You will need to login to your personal Facebook account before you can create your page. This brings me to my next point that I need to discuss before I proceed. Consider who your Facebook friends are. In some situations, you may not want your friends to know about your Facebook Pages that you create while others will want to share those pages with friends. In general, if you have marketing friends that you may not completely know or trust, you may want to consider privacy settings to prevent particular people from seeing posts from that page. There is a lot to privacy settings, but you should be able to find that information on Facebook if you need more help. To get to Privacy Settings, just look for it in the menu that opens when you hover over the gear icon in the top-right of Facebook:
The reason I recommend this is because there are some marketers out there that will not hesitate to copy unique content and try to reuse or abuse it in some manner. For me, a lot of my Facebook friends are customers or other marketers, so I am forced to take measures to hide many of my pages from them. If you feel like this is something that you may need to be concerned about and do not want to both with privacy settings, you can always create a separate Facebook account that you only use for your Amazon affiliate endeavors. This is actually another reason why using Google Chrome could be useful if you use another browser as your default - you can stay signed into two Facebook accounts at once (one on each browser). I use a separate Facebook account for the Pages and Groups that I do not want to share with other marketers, but you are welcome to choose your own direction based on your situation. You will obviously be able to get a quicker start by using your existing account and sharing your page with friends, if that is something you think you can do without prolems. However, I at least wanted to discuss this point before going on to creating the actual page. At the top of Facebook, just type create page into the search bar. Then click on Create New Facebook Page, which will show up below the search bar.
Next, you have to select what type of page you want to create. You could really follow this tutorial loosely to create any kind of Facebook Page, but we will be creating a Company, Organization or Institution Page.
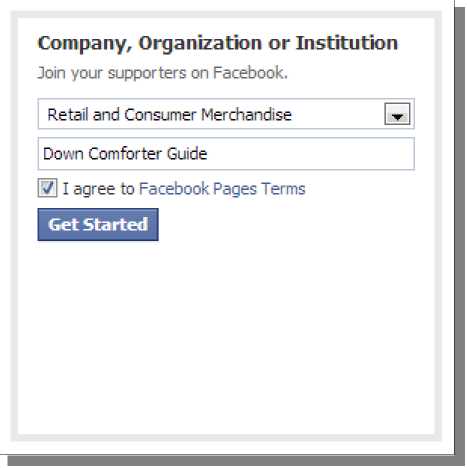
Once you click on Company, Organization or Institution, it will change to show a drop-down box, text box and checkmark. You can see the picture below that shows this area and how I have filled it out.
Note the link to the Facebook Pages Terms: https://www.facebook.com/page_guidelines.php Make sure you are following these policies. You should not be creating a page that makes it confusing or misleading to people so they may think that you represent a company that you do not (ie, don't create pages for Brands). In general, I usually just go for my website name, especially since it is my primary keyword phrase (makes for good SEO). However, make sure you don't violate those guidelines by doing so - they do not allow the use of only a generic term like “beer” or “pizza”. However, something more specific like “Down Comforter Guide” should be fine, especially since it is the name of the website. When you select a category, try to find something that matches the niche of your website, if you can. If you cannot, you may just want to select Retail and Consumer Merchandise for now. I will be doing this on my site since there is not a Home & Garden category available here. I will actually be going into the Page Settings once I am done to make some changes to this because it creates this Page as a Community Page. That type of page doesn't allow Insights (demographics stats for your FB Page). Once you have selected a category, provided your company name, and checked the check box, click on the Get Started button to proceed. Now you just need to provide a series of information to create your Page. First provide a brief description of your site. This can be up to 155 characters in length, so try to pack as much power into this one statement as you can. It can help you get more exposure by including relational keywords here and/or emphasizing your main keywords again. Next provide your website address. This will show up on the About page linked from your FB Page, so people will be able to easily visit your site if they want. Finally, provide a URL for your Facebook Page. I try to just use the same thing as the name as the site, especially since this contains my keywords. However, you may have to pick an alternate if someone else has already claimed the URL. Once you set this, you cannot change it without creating the page again and starting over completely, so be sure you have it set to what you want before you proceed by clicking the Save Info button.
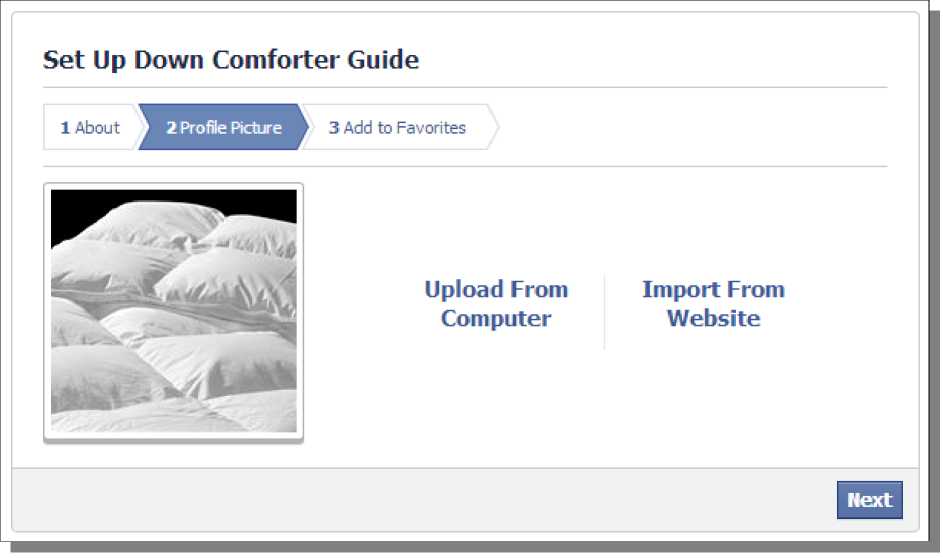
Next you need to set a profile picture. This can be an image that you upload from your own computer or you can provide your website address to pick from images you have already used there. Click on either Upload From Computer or Import From Website, depending on where you want to retrieve the image from. Then just select your image that you want to use.
I have added in the picture for my profile, which is a picture that I also used on the site.
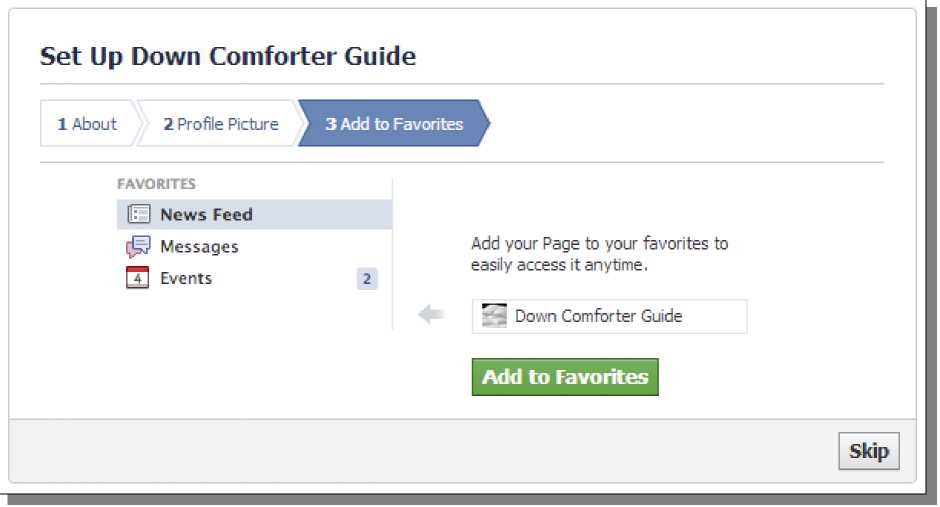
Once you have loaded a picture, click the Next button to proceed. The final step is actually optional. It just recommends adding the Page to your Facebook Favorites menu so you can find it easily. This will show up in the left-hand sidebar menu when logged into your Facebook account.
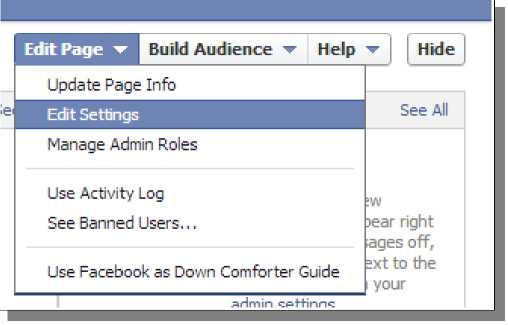
After you proceed past this step, you will be taken to your Facebook Page, which is now live! The first thing I want to do is edit the settings for my page. Look for Edit Page in the top-right. When you hover over that, you will get more options - just click on Update Page Info.
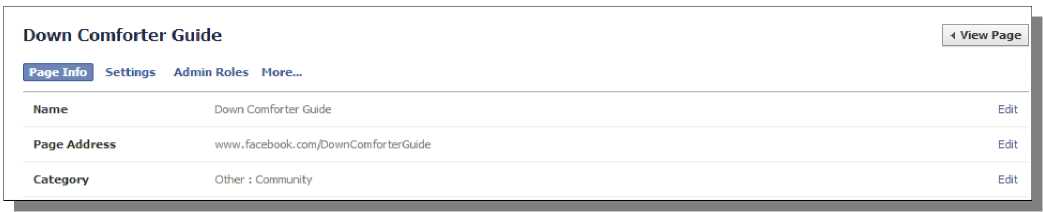
On that page, there are a number of settings that we will want to update. During the creation of the page, Facebook just asked us for basic information to get it set up, but there is actually more info we can provide to enhance this page a bit. The first thing I want to do is change the Category. If you click on the Edit link on the far-right of that row, you can set a new category.
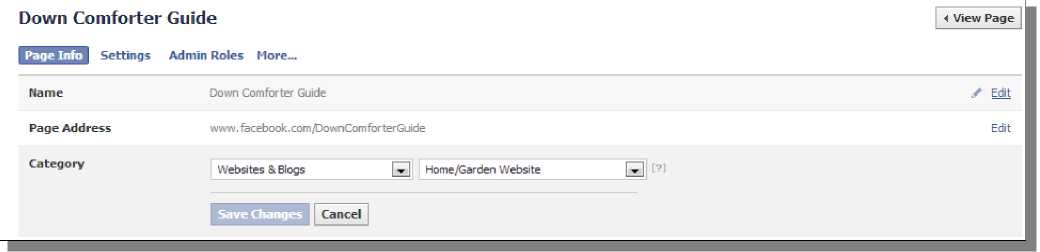
I am changing my site to Websites & Blogs -> Home/Garden Website. This classifies my Facebook Page as a Home & Garden Website Page and not as a Community Page. The main reason for this change is to get access to Insights - demographics stats for the Page.
Beyond the Category change, there are some other settings here that can be set that were not previously set during the creation of the page. Although these are optional, the more information you can provide about your site and your niche here, the easier it will be for people to find your Facebook Page.
The first setting here is Topics. This allows us to set some relational keywords for our page, which can also aid with additional exposure within Facebook. As you start to type a word for this setting, you'll see that various Facebook pages begin to show up below your typing. You can actually choose an existing page or interest on Facebook to use as a Topic to get potential exposure from people that like those pages or search for them.
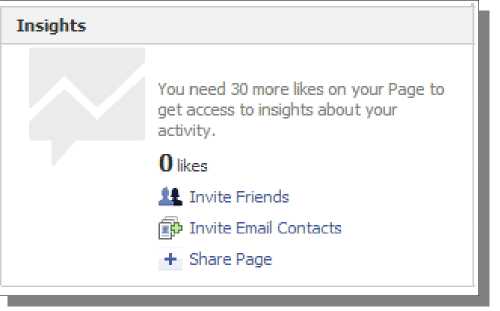
Beyond Topics, the other main setting here that I would recommend that you update is the Long Description. Treat this just like the Short Description, except you're allow to provide much more text. All of this text will show up on the About page, which is linked from your Facebook Page and available for the public to see. There are some other settings that could be provided here, but the ones I've discussed are the most important that will help you attract more visitors to your page from Facebook and/or search engines. Once you're done editing settings, you can simply leave and return to the main Facebook page. There are a couple of additional things that I would like to mention here. The first is Facebook Insights. This is the main reason I changed the page category - to get this section. If you don't see this in the center of your page towards the top, change the category to something else until this shows up.
Once you reach 30 likes on your page, you'll receive information about your page likes, engagement with your posts, and even demographics for your fans. This information can be valuable to help you figure out what is working and what isn't for your particular niche and products. The next thing I want to briefly mention is the status update bar. This should look familiar to you if you're familiar with Facebook. Just go here on your Facebook page to make posts. Posts can be made on a regular basis, if you would like, or they can simply be done sporadically. However, more frequent posting (especially non-promotional posts) will help you to build a following faster.
© Facebook Marketing >>> Back to TABLE OF CONTENTS <<< | |
| Views: 724 | |


| Total comments: 0 | |