AdWords Keyword Planner
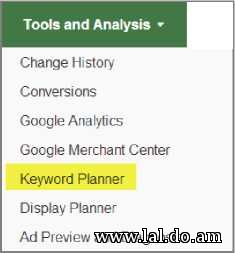
Google has a tremendous amount of search data. Between its organic and paid search listings across its web properties such as news, Google.com, Google sites in various countries, images, and even products, Google has compiled a massive amount of data about search queries. One of the most powerful tools you can use to start your keyword research process is Google’s own AdWords Keyword Planner. This tool can examine the information collected across all of these various properties. You can access the AdWords Keyword Planner from within your account (Figure 3.1).
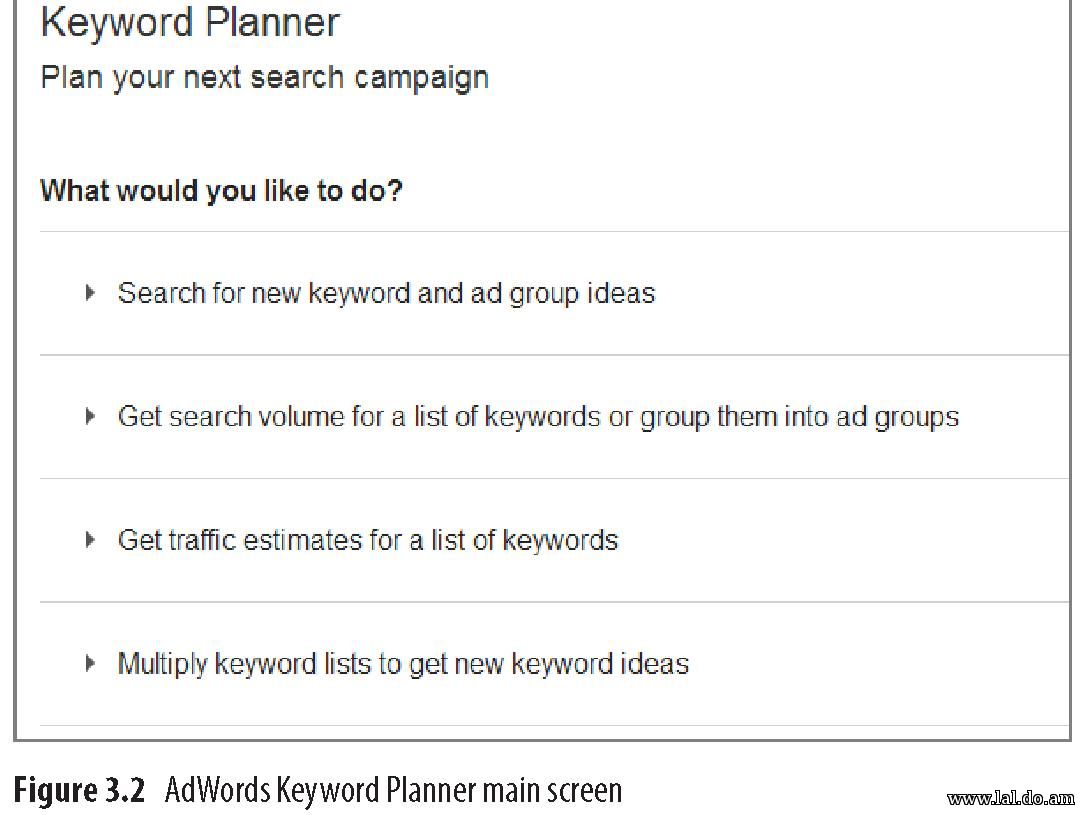
Figure 3.1 Accessing the AdWords Keyword Planner There are two primary uses for this tool. The first is to research new keywords, and the second is to get detailed keyword traffic estimates. For both uses, Keyword Planner gives you options to change targeting methods and filter the data (Figure 3.2).
In this first section, we will examine how to use the tool to research keywords; then we will examine the targeting options and filters, how to get more detailed keyword estimates, and how to add your newly found keywords into your account.
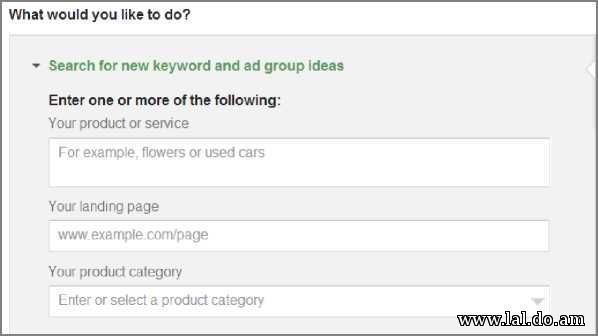
Generating Keyword Ideas When using tools to generate ideas, keep in mind that they are just tools run by computers. These tools do not know your business, they do not think, and they do not understand your customers. While a tremendous amount of data is available from these tools, you are the one responsible for choosing your keywords. Ensure that the keywords you choose accurately describe your products or services, the problems they solve, and the conditions someone may be in when they need your business. Remember, keywords are thought processes. You should start by finding wide keywords—those keywords that describe the vast ways people search for words that are not closely related (for example, spyware, adware, virus, keylogger)—before diving deep into one specific keyword (for instance, spyware, spyware remover, spyware program). We will first look at the three main ways of conducting keyword research and then examine the filters and then the data. When you choose the first option in the Keyword Planner tool, Search For New Keyword And Ad Group Ideas, you will be presented with three options on how to find keyword ideas (Figure 3.3).
Figure 3.3 Search For New Keywords And Ad Group Ideas screen We will examine each of these methods in detail so you know how each method works and can generate accurate ideas for your account. Word or Phrase The first way to use the AdWords Keyword Planner is to input words or phrases from your products or services and ask Google to show you similar keywords and related keyword ideas. Use this method when you are first starting your keyword research to identify the synonyms and ideas related to your major keywords. When you find different wide keywords, note them in a separate list from your keyword research. Doing so will help you keep tabs on the wide keywords and separate them from the thousands of keywords you might normally add to your ad groups. This tool ignores match types for keywords you enter here, so there’s no need to include match type syntax here. Later in this process, you can adjust the match types in the keyword details area. You’ll find this tool especially valuable after you’ve had your campaigns for a while and you’ve accumulated a reasonable amount of data on your conversion rates and costs per conversion. If you see that a few sets of wide keywords are driving most of your sales or costs, you can dive into all the variations of those keywords.
Your Landing Page: Jumpstarting Your Keyword List Since you already have a website and most likely you spent quality time writing your content, wouldn’t it be useful if you could just receive suggestions based on each of your website’s pages? That is exactly what the landing page option accomplishes. You can enter a landing page URL in the landing page field, and the Keyword Planner will crawl that page attempting to decipher what keywords describe the content on that page and then suggest keywords based on what it finds. This is an excellent way to discover your wide keywords.
The Keyword Planner will work on most HTML sites, but most Adobe Flash pages, some Ajax pages, and other unique coding methods not based on basic HTML code can have problems being crawled and understood by search engines. Google and others have made great strides in attempting to crawl sites designed in Adobe Flash and these other methods, but often these sites have a difficult time achieving relevancy in AdWords because Google’s crawlers cannot understand their pages. To find out whether AdWords has any problems understanding your website, enter your landing page URL in this tool and examine the results. Just because the Keyword Planner brings back information about your page does not always mean it can be crawled well. In any case, it is good directional information if Google has some understanding of your website.
You can spider competitor pages, industry pages, search results, and so on to help build your wide keyword list. Here is a list of sites to spider when you are first starting your wide keyword research:
Note that you may want to do a search on some of these sites for your keyword first. For example, spidering the home page of Thesaurus.com is not useful, whereas spidering the search result page for your keywords at http://thesaurus.reference.com/ browse/YourKeyword will be more relevant to your company.
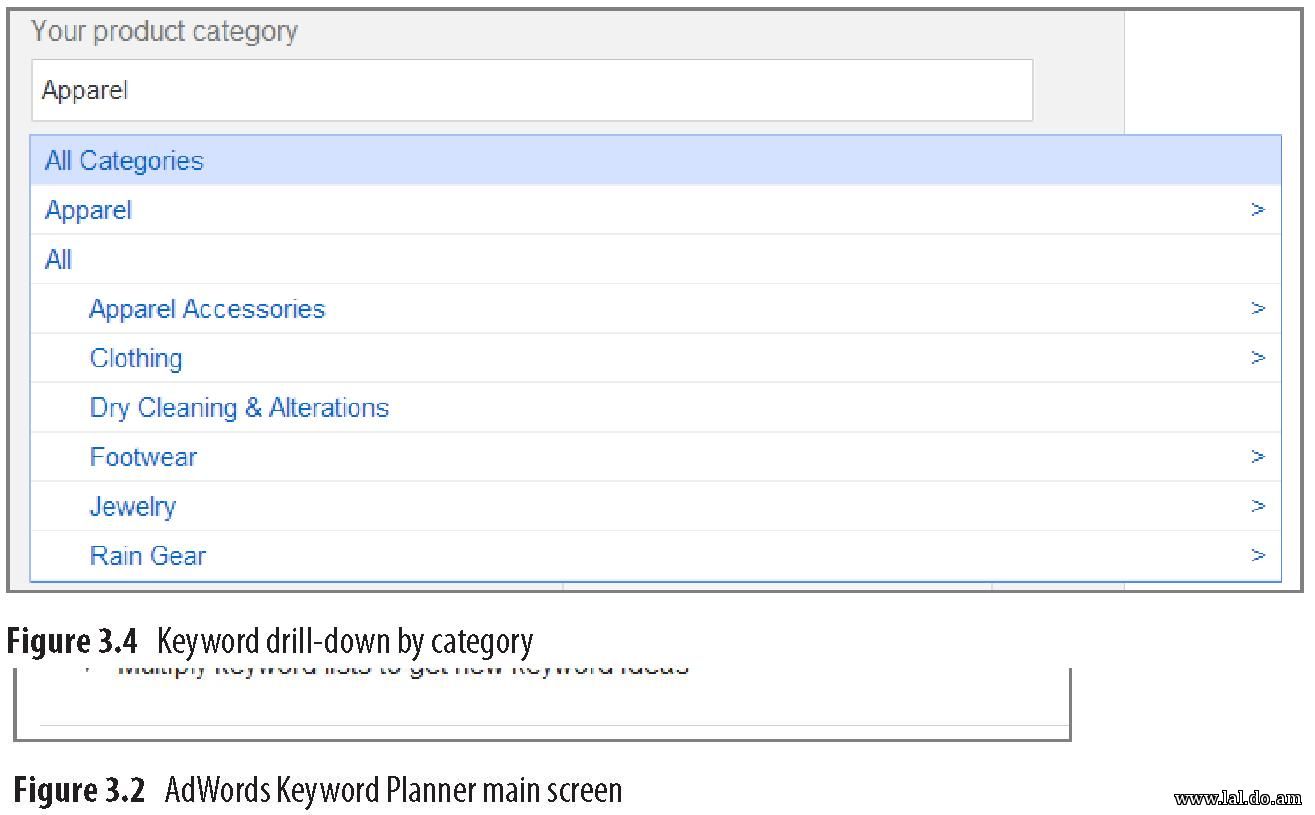
Every time you see a page on the Web that is highly related to your business, make note of the page so you can spider it when you do keyword research. This simple exercise will help you expand your keyword list over time. The Keyword Planner can also help with your search engine optimization (SEO) efforts. With SEO, you do not get to pick keyword match types—you have to choose exact keywords. More advanced versions of SEO tools are available that examine traffic more than individual keyword rankings, but you have to start somewhere. When using this tool for SEO research, make sure you only look at the exact match of a keyword when trying to predict keyword volume. Even beyond SEO and pay-per-click advertising, if you are looking for related keywords, or for thesaurus, competitor, trend, and other data, the Keyword Planner has uses within social media as well as competitor research. It is a powerful resource for conducting keyword research about your specific website and almost every other website on the entire Internet. Always keep this tool in mind when you are trying to find new wide keywords or when you come across an authority site related to your industry. Keyword Suggestions by Category The other way to use the Keyword Planner is by browsing through the categories. When you click the category section, a large drill-down of various categories and subcategories will appear that you can select (Figure 3.4).
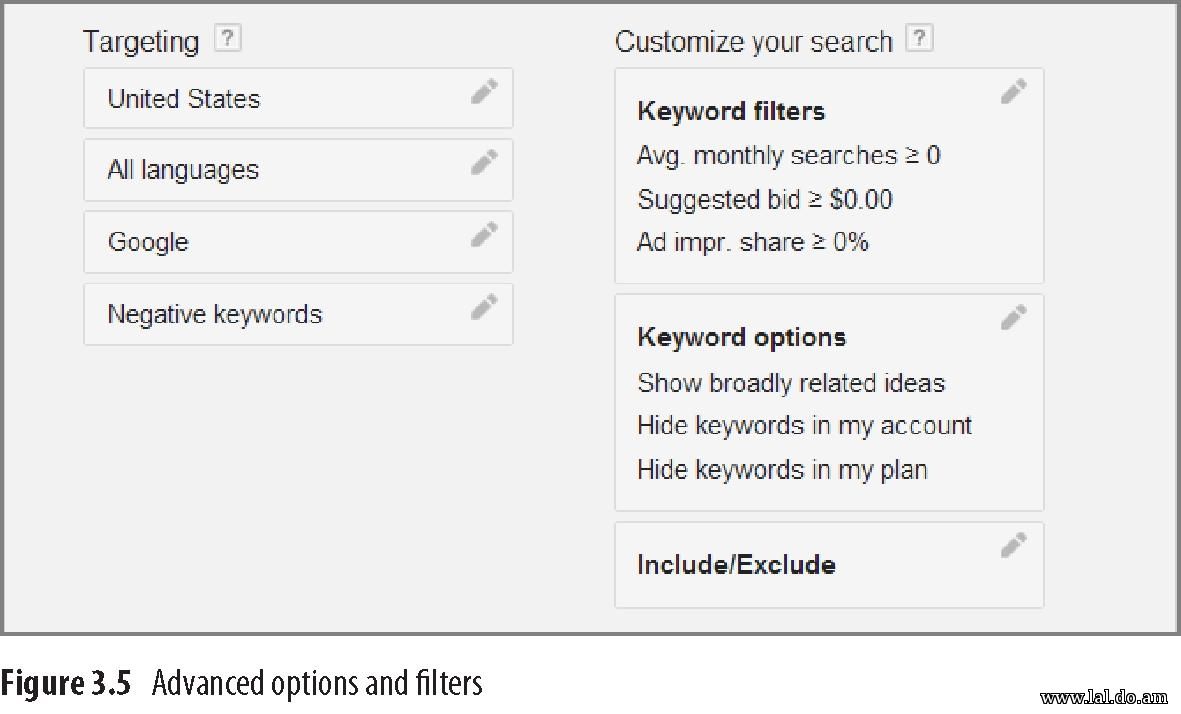
In addition, you can quickly search through the categories by inputting words that describe your products, and the tool will show categories that match your search. Most of the keyword suggestions will be wide keywords. In many cases, the keywords will be so general you might not even want to use them in your AdWords account. One of the best uses of the categories is to find other keyword themes you may have missed. This is good information for not only your AdWords keywords but also your natural search rankings. You may see better ways to structure your site navigation based on some of the category information. In addition, this information can be useful for determining how to structure your ad groups. Browsing categories is useful for finding ideas on keywords you might have missed or for gaining insight into Google’s association of keywords within a category. However, never build your AdWords account just using the category tool. There are too many poor suggestions and missing keywords per category to rely solely on this tool. After you specify how you want to find keywords, the next step is to specify the type of data you want to see based on the advanced options and filters. Advanced Options and Filters Keyword Planner lets you specify targeting and filtering options to help you get the information you are most interested in. The filtering options narrow the data based on the targeting options you have set (Figure 3.5).
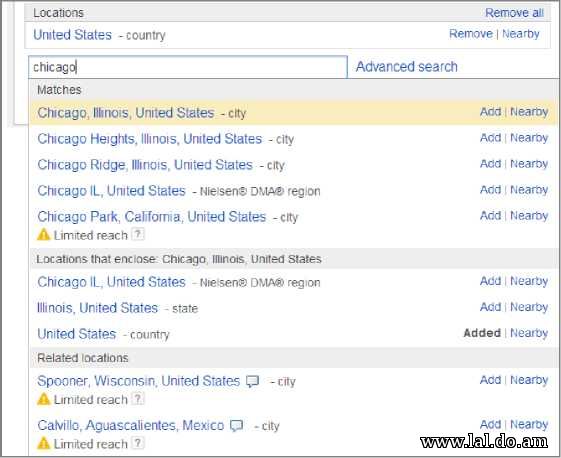
These options are shown within the initial search or on the Keyword Planner interface screen. Your first targeting option is geography. You can do research on any of Google’s preset geographic options, such as countries, states, provinces, and metros (Figure 3.6). If your company is global, it is useful to estimate to a single country at a time so that you can obtain a better estimate of search volume and costs per click (CPCs) for each country. It is common for CPCs to vary dramatically by country, and when possible, you should limit your campaigns to showing in a single country (location targeting will be discussed in Chapter 11, “Utilizing Advanced Geographic Targeting Techniques”). If your business serves only a single region, then you can narrow your keyword ideas and research to that specific region.
Figure 3.6 Location targeting options
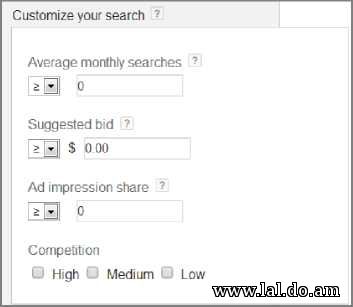
By default, Google gives estimates only for Google’s properties. If you want to receive estimates that include search partner data, edit the Google targeting option, select Google, and search partners. Finally, if there are some negative keywords you know you want to exclude in keyword research so they don’t inflate or muddy your estimates, you can enter them individually or copy and paste them from a list. Once you’ve specified your targeting preferences, you can then customize your research by adding filters, starting with search volume, bid prices, impression share, and competition levels (Figure 3.7).
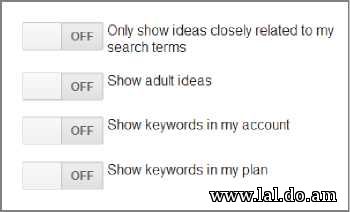
Figure 3.7 Keyword Planner filtering options for search volumes, bid, and competition levels If you are just starting out researching a new account, then you will most likely not filter any data. However, if you have been running an account for a while, then you will want to filter the data based on the new types of keywords you are trying to find. The first filter is Average Monthly Searches. You can choose to show only those keywords with search volume above or below a number you select. If you are looking for wide words to get an idea of new possible areas to advertise, then seeing only keywords with higher search volume is useful. If you have some wide words that have been useful for you and you want to expand into long-tail keywords from these wide words, then showing only lower keyword volume is useful. The next filter is Suggested Bid. If you do not have a high budget, then you will usually want to filter out overly expensive keywords. The suggested bid is an estimate only; it is not necessarily what you will be using in your account. It can give you a good overall idea if a keyword is going to cost you $2 or $20, but it is not accurate enough to tell you if a word will cost you $1.20 or $1.25 per click because those CPCs are very close. When you use the Suggested Bid filter, it is suggested that you increase the filter to 30 to 50 percent higher than what you will bid for a keyword to give you a wider range of keyword ideas because in some cases your actual CPC will be lower than what is suggested (and in some cases it will be higher). Ad Impression Share is the percentage of times that you have been shown for a keyword when one of your ads was eligible to be displayed. For instance, if a keyword could have received 1,000 impressions and your keyword was shown for 100 of those, then your impression share is 10 percent. When you have a select set of keywords that are performing well and you want to add additional ideas around those words, this is a good filter to use. You can select impression share under 50 percent and then find ideas for which you have little exposure. Please note that the impression share in the tool is based on query data and not keyword data. For instance, if you have the broad match word flowers in your account, you could show for the term exotic flowers even if that word is not in your account. When you examine the data, you will see the impression share for that query even though it is not an actual keyword in your account. Finally, you can filter on competition. The Competition filter is just a wide range of estimates of how many advertisers are using this keyword. There is not always a correlation between CPCs and competition because you might have very little competition for a word, but the current competition is willing to pay a lot per click. In other instances, there may be many advertisers using a keyword, but the keyword is not worth that much per click, so all the bids are low. The second set of filters is based on keyword options (Figure 3.8).
Figure 3.8 Keyword Planner filtering options for keyword characteristics There are four options here:
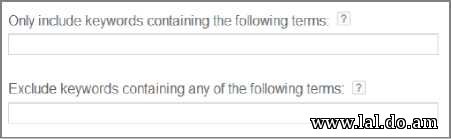
The last option is to filter the actual words that are displayed based on the keyword idea containing or not containing that specific term (Figure 3.9).
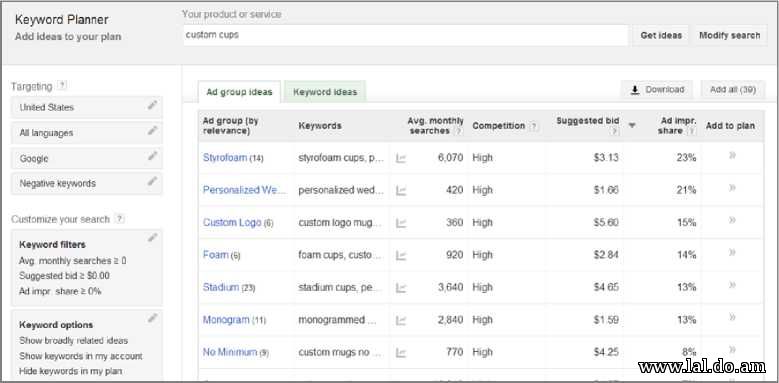
Figure 3.9 Keyword term filters If you are trying to find permutations of a single keyword, the include option is useful. If there are some words that commonly show up in your keyword list that are not related to your products and services, then the negative filter can save you from continuing to see those words in the suggested keyword ideas. Once you have selected your criteria for finding keywords and are ready to see some suggestions, click the Get Ideas button and you will be presented with suggested ad groups and keywords ideas. Ad Group and Keyword Ideas Once you determine the search method and filters used to find keyword ideas, the next step is examining those ideas to see what keywords and ad groups you want to use in your account. Please note that the Keyword Planner is very different from the old keyword tool. With the old keyword tool, you found keywords and then could estimate data within the tool and then add keywords to your account from that tool. In the Keyword Planner tool, there are three steps to keyword research: choosing how to find ideas, picking your ideas, and then estimating traffic and for those ideas. In the second step, picking your ideas, you will examine the presented ideas and look at how to organize these ideas into ad groups before you review your estimates and add the keyword and ad groups to the account. When you run the tool, you will be presented with a screen of data and options (Figure 3.10).
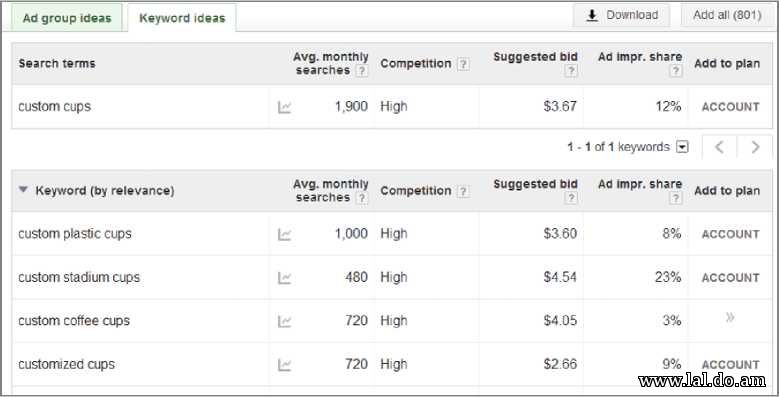
Figure 3.10 Ad Group Ideas screen At the top of the screen, you can change the product or service you are getting ideas on. On the left side of the screen you can change your targeting and filter selections. The middle of the screen is where you will spend most of your time. Keyword Planner Data You can view data for either your ad group ideas or your keyword ideas in the middle section of the screen by clicking the associated tab. The type of data is very similar in these views. The main difference is that the ad group ideas view shows aggregated data from all the keywords in that ad group. The keyword ideas view shows the data for each individual keyword (Figure 3.11).
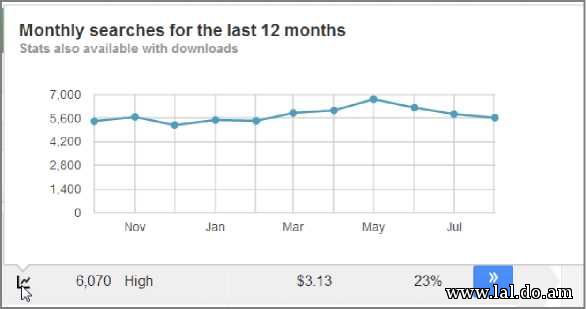
Figure 3.11 Keyword Ideas screen Let’s first examine the data that is presented on both screens and then walk through how to use that data. Ad Group (By Relevance) The ad groups are sorted by Google’s estimated relevance to the search method you used to find keyword ideas. If you click into an ad group, you will see the keyword data just for that ad group. Keyword (By Relevance) In the ad group screen, you will see a preview of a few keywords in that ad group. In the keyword ideas screen, you will see the keywords’ actual data and can sort the keywords by relevance, volume, competition level, and impression share. Trend Graph If you hover over the graph icon, you can see the last few months’ trends for a keyword (Figure 3.12). Because this graph does not cover a full year, it is not good for predicting year-over-year seasonality. To get a better idea of seasonality, we will examine the Google Trends tool later in this chapter. This graph is good for a quick look to see whether the keyword is increasing or decreasing in volume regardless of year-over-year changes.
Figure 3.12 Trended data Average Monthly Searches This is the average monthly search volume for that keyword. The Keyword Planner tool does not have the ability to see data by match type, so this information is loosely based on broad match estimates. Competition This is the amount of competition—high, medium, or low—that any one keyword has based on the number of advertisers in the location you are targeting. Just because a keyword has high or low competition does not mean the keyword will be necessarily be expensive or cheap. Suggested Bid This is a rough bid estimate based on the other bids in the targeted region. It usually has a rough correlation with the “top of page bid,” which is an estimated amount of the minimum you need to bid to have your ads displayed in one of the ad positions above the organic results. This is a suggestion only. You can get much more detailed information about how your bids impact your estimated clicks and impressions on the estimates screens. Ad Impression Share This is the percentage of times your ad has shown for this keyword when it was eligible to be displayed. Add To Plan Finally, you will see an arrow to add a keyword to your plan. If the keyword is already in your account, there will be a notation on the arrow that the keyword is in the account. By clicking this button, you will either add all the keywords in an ad group to the plan or add an individual keyword to the plan if you are in the keyword or ad group details screen. Now that you have an understanding of the data on this screen, let us take a look at how to work with the ad groups and keywords to build or expand an AdWords account. Building Your Account with the Keyword Planner From a high-level conceptual standpoint there are three ways to use this tool. The first is how the tool was intended: Choose your ad groups and keywords to build or expand your account directly from the tool. This is the best use for newer advertisers. Because you can save your ad groups and keywords directly to your account, you can build out your account directly in the interface. The second is to find new keywords and ideas that are not currently in your account. In this case, you will often add keywords to some existing ad groups and others to brand-new ad groups. If you are adding a few keywords and ad groups, then the tool will accommodate your needs. If you are adding many new keywords to existing ad groups and also creating new ad groups, then the tool can be overly time consuming to use and you may want to download the data and import it using the AdWords Editor (covered in Chapter 12, “Saving Time and Scaling Accounts with the AdWords Editor”). The last way to use the tool is for more advanced users. The one issue with the tool is that it does not easily allow you to add modified broad match keywords or even the same keyword with multiple match types to your account. In this case, you will often do your research into the tool and then download the data to a spreadsheet program. Within the spreadsheet program, you can then do the following:
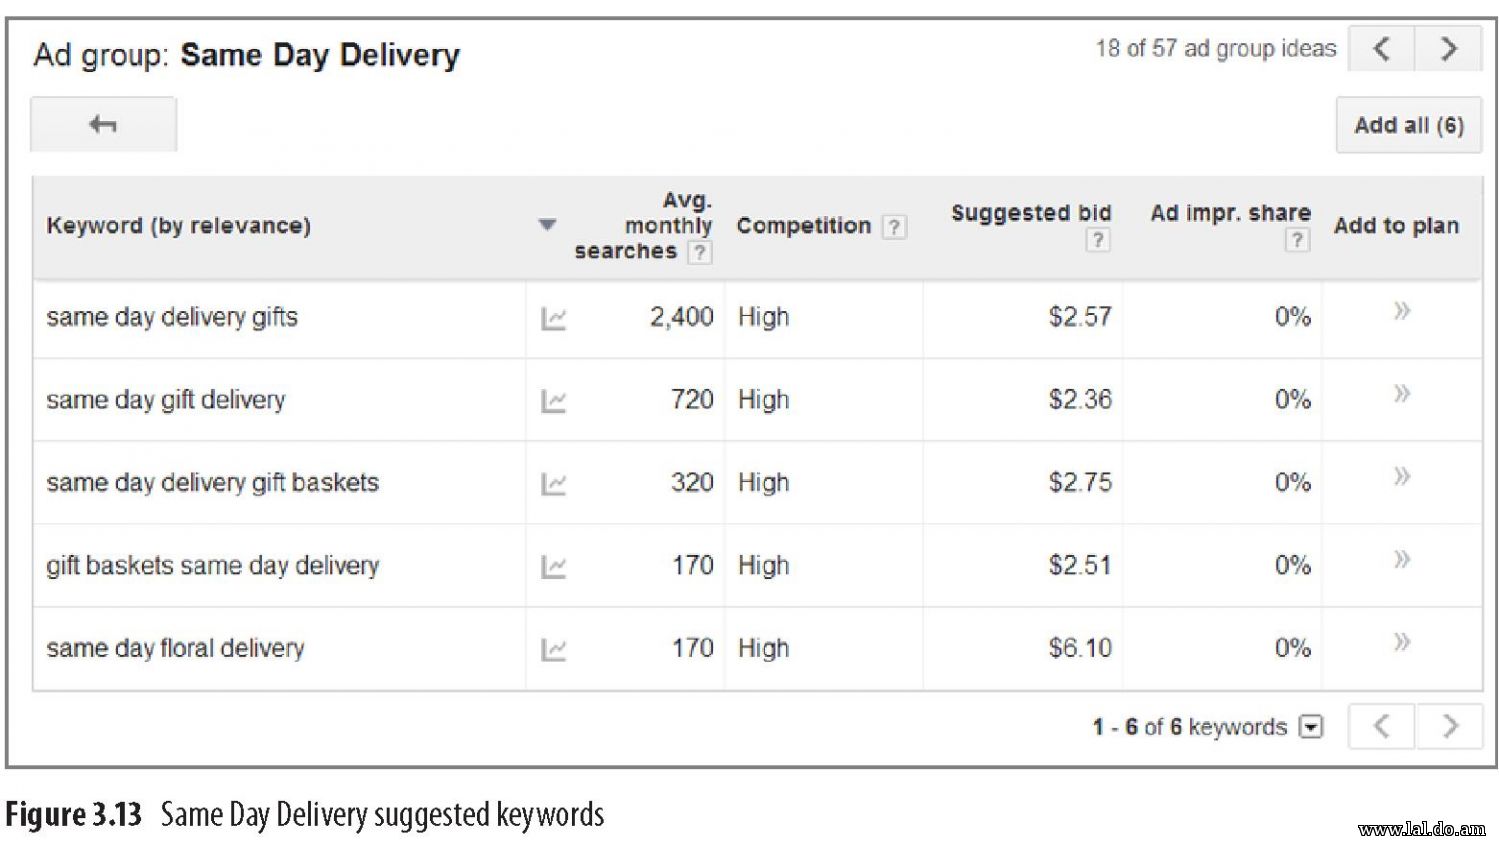
Once you have manipulated the data in a spreadsheet, you can then use the import function in the AdWords Editor to easily move the data into your account. In this section, we will mainly focus on using the tool to create new ad groups and populate them with keywords. If you can understand that basic usage of the tool, then the additional ways in which you can use it become obvious, especially after reading the AdWords Editor section of Chapter 12. Choosing Ad Groups and Keywords The first step is to take a look at all the ad groups and determine which ones are suitable for your advertising needs. When you find an ad group that you want to add, do not just add the ad group. If you add the ad group, you will add all of the keywords in that ad group, and in many cases either there are unrelated keywords in that ad group or the ad group should be broken down into multiple ad groups before you save them to your account. For example, if you are advertising flowers, one of the suggested ad groups is Same Day Delivery. Since many florists do offer same day delivery, at first glance this looks like a good ad group. However, when you examine the actual keywords that are included in that ad group (Figure 3.13), you see that more than one suggestion is for gift basket delivery and not flower delivery.
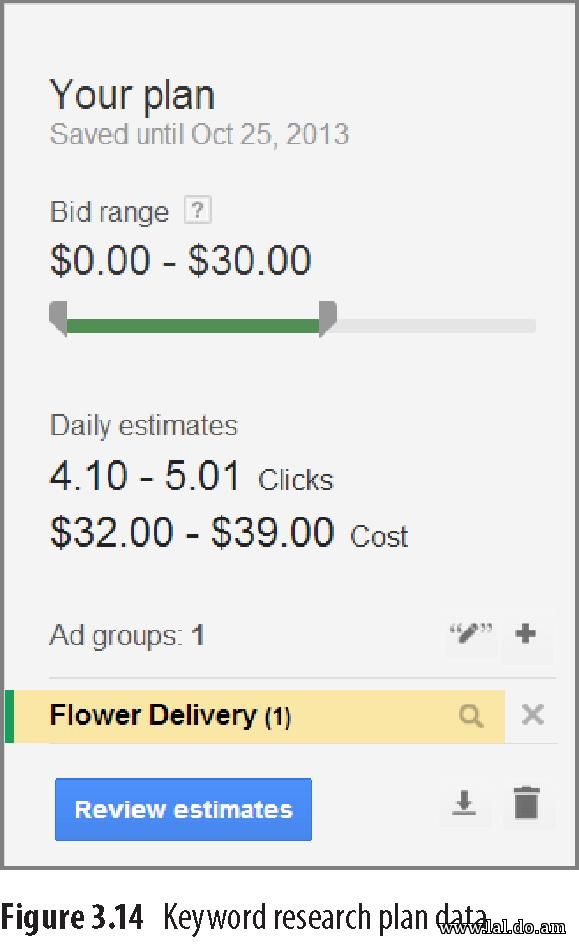
This is because the ad group suggestions are based on common keywords in the ad groups’ name. All of the suggestions do contain same day delivery; it’s just that not all of them are for a flower product. In this case, you can add the individual keywords to your keyword research plan (Figure 3.14) that you want to use, but you would not want to add the entire ad group.
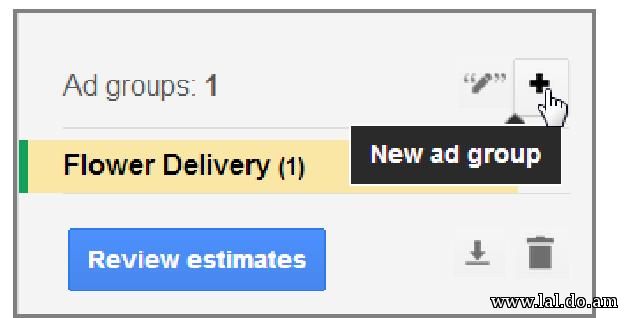
Now that you have a plan, you will want to go back and add more keywords and ad groups to the plan. If you add more keywords to the plan, they will be added to the current ad group (in this case, it’s Flower Delivery). If you want to add keywords into new ad groups, you first need to create those new ad groups from within the plan by clicking the + button (Figure 3.15) and adding a new ad group.
Figure 3.15 Creating ad groups in a plan
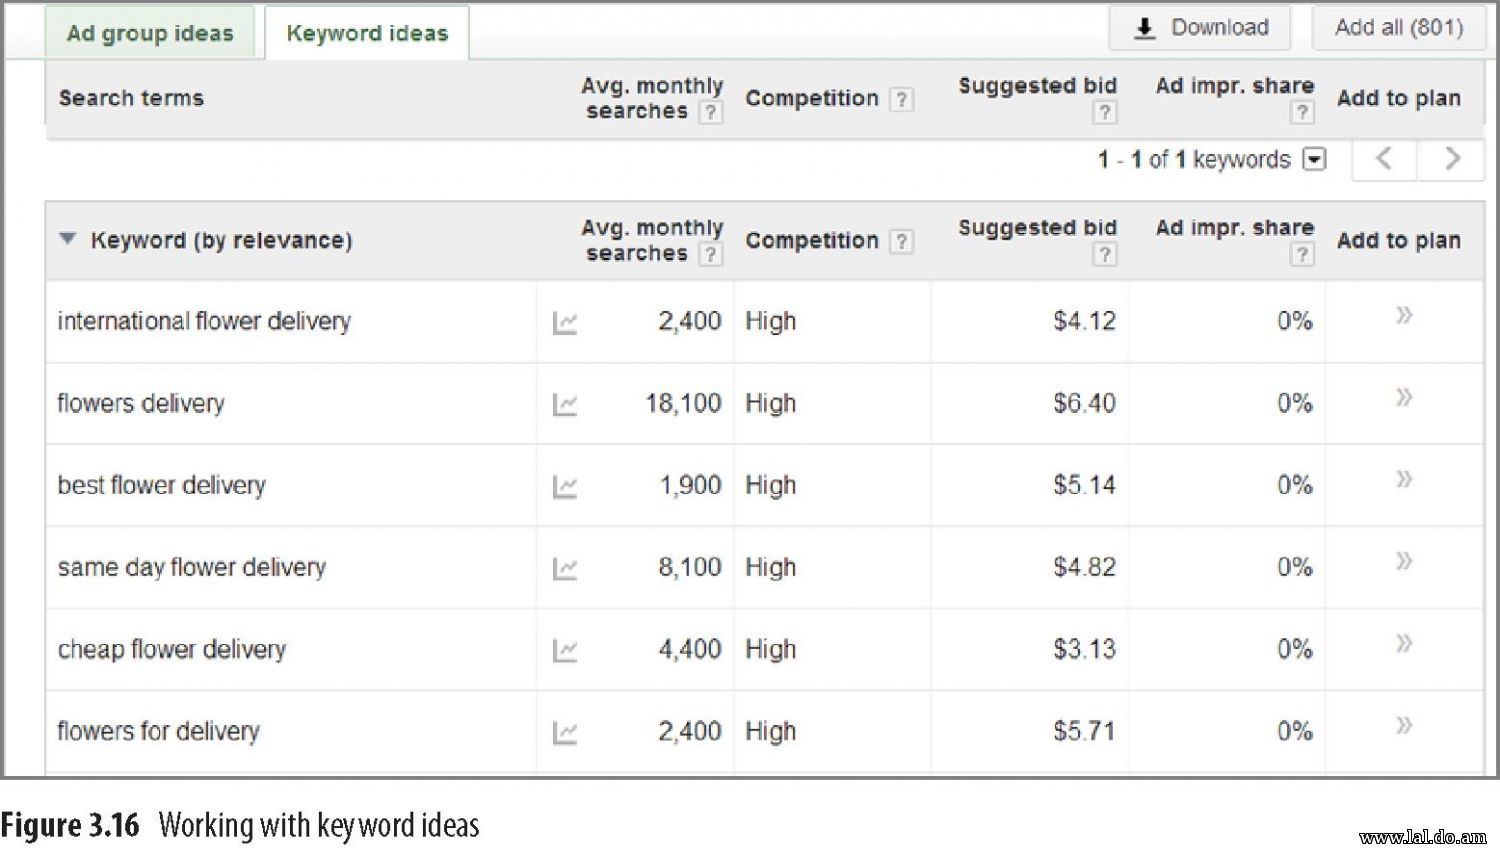
As you are building out your plan with new keywords, you can also adjust the bid range of those keywords to see an overall estimate of the number of clicks and the total cost of those clicks for the keywords in your plan. If you are not building a full ad group but instead just want to add individual keywords to your plan, instead of working from the Ad Group Ideas screen, you can work from the Keyword Ideas screen (Figure 3.16).
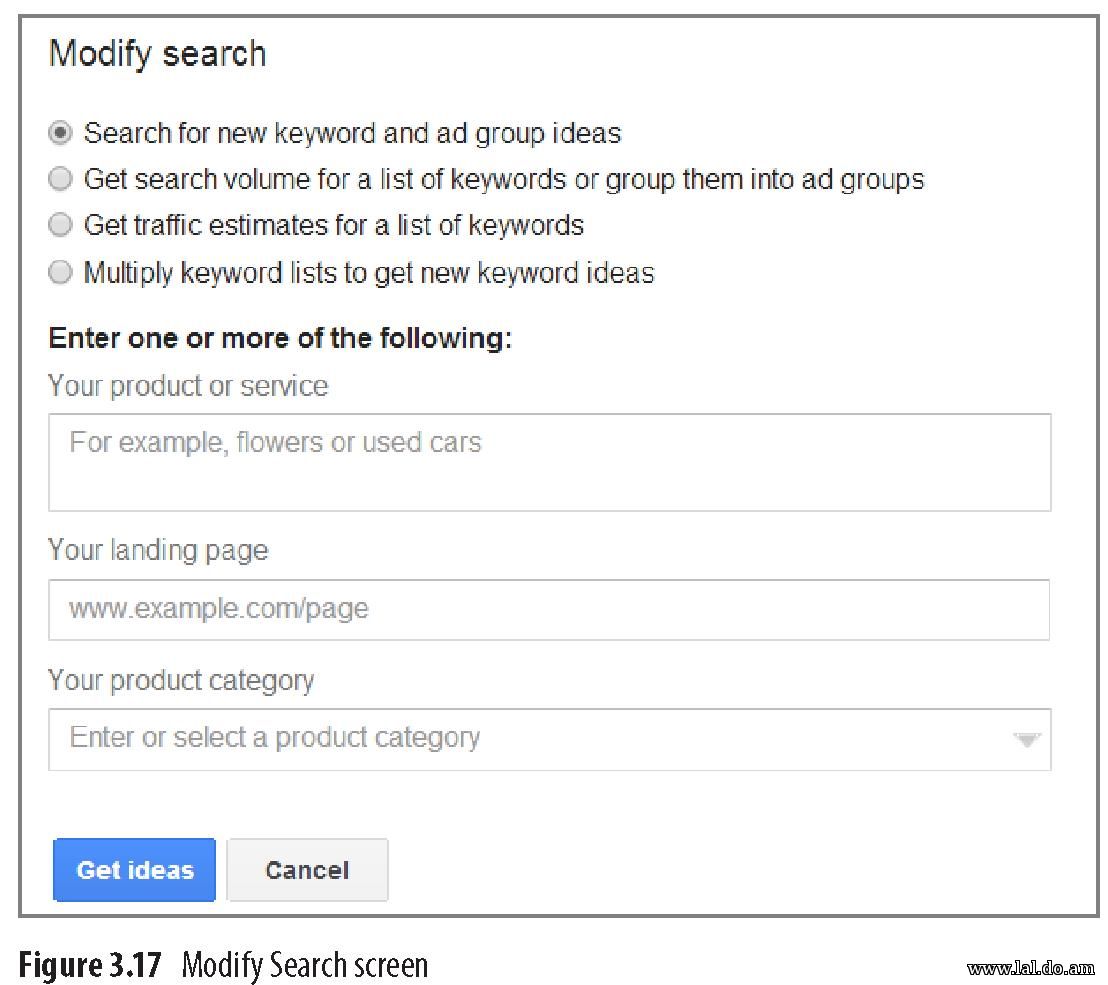
This screen functions in the same way as the Ad Group Ideas screen with the exception that you are adding single keywords as opposed to full ad groups or single keywords within ad groups. If you are building a new account, you will most likely start with the Search For New Keyword And Ad Group Ideas option, shown in Figure 3.17. If you start with this option and begin from a single keyword or phrase, then you will want to change the search query a few times to keep finding new keywords. An easy way of coming up with new words to input into the search tool is to take a look at the suggested words from your initial query that either have so much search volume that you do not want to use them or are a little too general to use in an account; you can put those words back into the search tool to find more specific combinations related to that query. If instead you start with inputting a word or phrase, at any time you can click Modify Search and then input a landing page that you are using (or go from one landing page to a new one) or even look through categories for new ideas.
Once you have saved the ad group and keywords into a plan, you have four options; you can either download the data by clicking the down arrow, copy the keywords to the clipboard by clicking the clipboard icon, delete the plan by clicking the trash can icon, or get detailed estimates for your keywords by clicking the Review Estimates button (Figure 3.18).
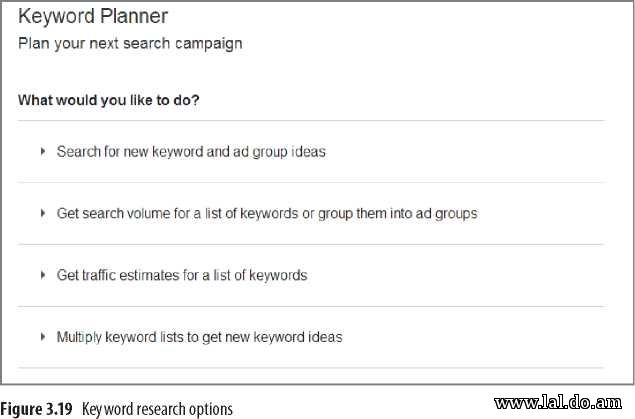
Figure 3.18 Downloading, copying, deleting, or reviewing estimates for your plan data The estimates screen then allows you to get details about your click volume, estimated costs, and initial CPC data.. First, we’ll cover all the ways you can get to the estimates screen, and then we will dig into how to work with the estimates. Traffic Estimates Finding keyword ideas is one half of the Keyword Planner tool; the second half is estimating traffic based on ad group and keyword data. There are several ways you can reach the Traffic Estimator tool. The first is to research keywords and ad groups, as discussed previously, and then review your estimates. The other methods are through the initial research screen of the Keyword Planner tool (Figure 3.19).
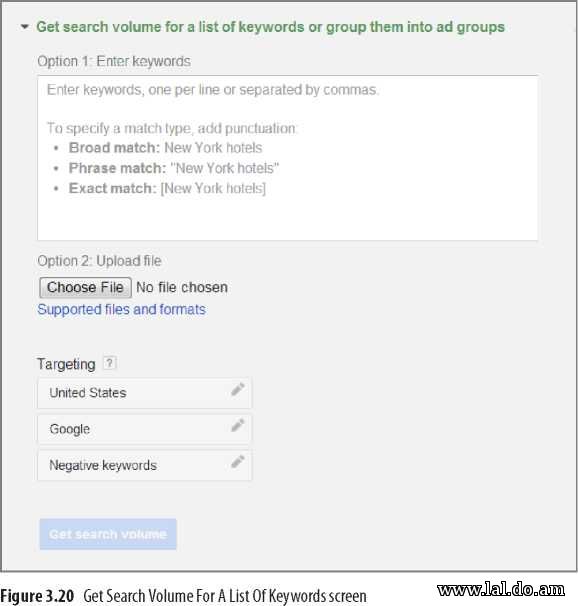
One option is to Get Search Volume For A List Of Keywords Or Group Them Into Ad Groups (Figure 3.20).
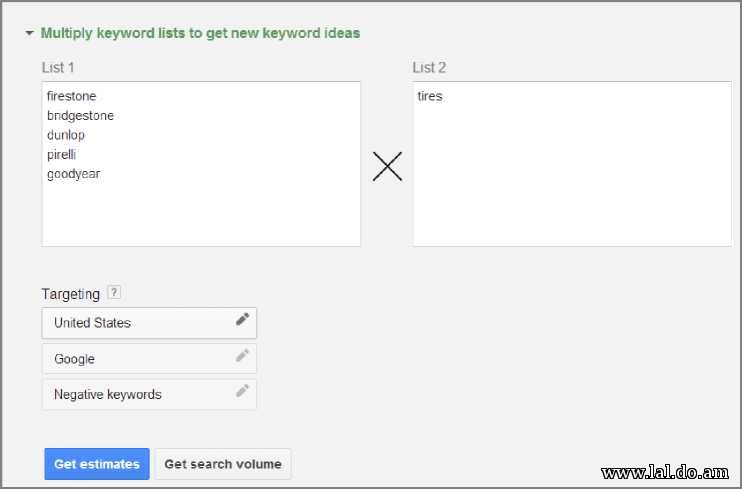
With this option you either type a list into the box, copy and paste a list from another program, or upload a list of keywords into the tool. You also have targeting options available as you do with some of the other research methods. Once you click Get Search Volume, you will be taken into the Ad Group And Keyword Ideas screen, as with the first option. If you want to get only estimates for these keywords, you can then click Add All and then Get Estimates to jump to the review screen. If you want to organize the keywords into ad groups, you can do so from the Ad Group And Keyword Ideas screen; however, it is much easier to do this grouping in a spreadsheet program than in the tool. The next option is Get Traffic Estimates For A List Of Keywords. This is almost the same as the previous option (Get Search Volume For A List Of Keywords Or Group Them Into Ad Groups), except it jumps you directly to the estimates screen and bypasses the Ad Group And Keyword Ideas Wizard. The last option is Multiply Keyword Lists To Get New Keyword Ideas (Figure 3.21). With this option, you can put lists of keywords into the input boxes, and then Google will combine these words to give you estimates.
Figure 3.21 Estimating from keyword lists Regardless of the method you use to create your keyword lists, in the end, all the tools can take you into the Traffic Estimator portion of the Keyword Planner tool, where you can review estimates and get a sense of potential clicks and costs for your keywords. Working with Traffic Estimates When you first arrive at the Traffic Estimator screen, the first thing you will notice is a large chart that shows you how many clicks per day you can expect to receive based on all of the keywords you have selected (Figure 3.22).
Figure 3.22 Estimated clicks per day You can hover over the chart and see your estimated cost, clicks, and impressions per day. This is an aggregate for all the keywords inside the planner. If you want to see the chart for just one ad group, then you will have to remove the other ad groups. You can view the chart by clicks, impressions, or cost per day. A good way to understand the change in impressions for top versus side of the page is to view the impression data and look for the large jump in impressions (Figure 3.23).
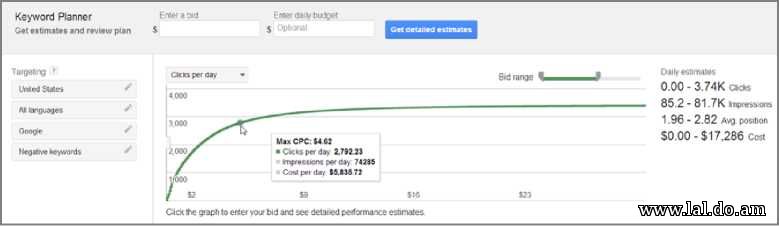
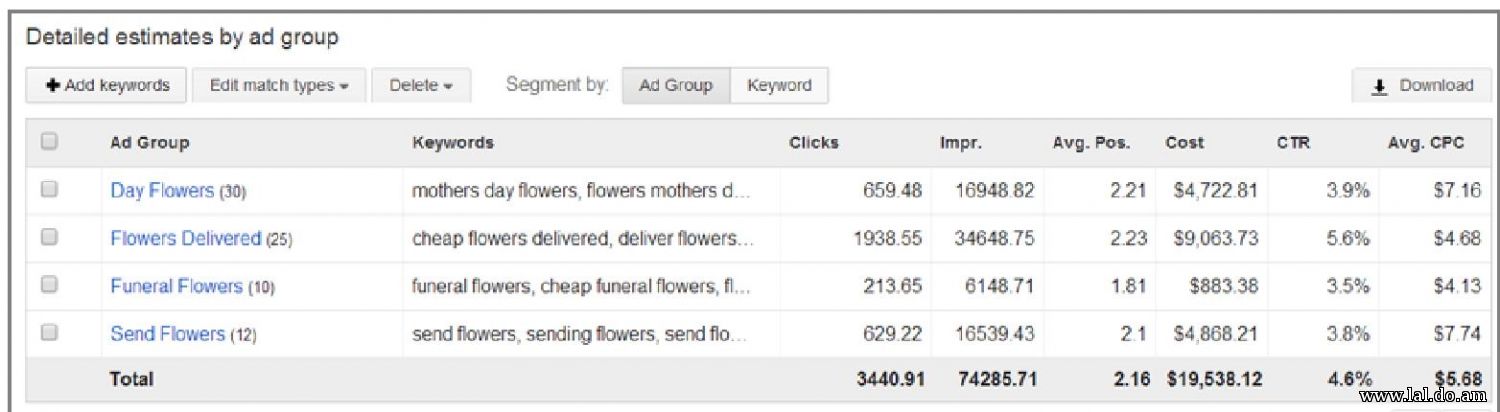
If you are looking to gain exposure for your new keywords right away and you have the budget to spend, then picking a starting CPC at the top of the jump will give you many clicks but at a higher cost per click. If you have a smaller budget, then you will often want to start with a lower CPC and look to see where you can receive the most clicks for your budget. Near the bottom of the screen, you can see details about each of your ad groups (Figure 3.24). By default, no data is shown for the estimates traffic. To see data for each ad group, near the top of the page is an Enter A Bid box. Once you enter a bid into that box, you can see traffic estimates for each ad group.
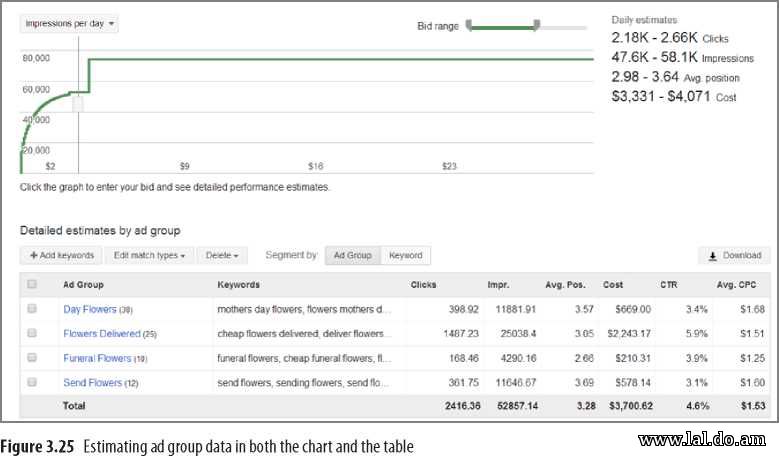
Figure 3.24 Ad group estimates If you just want to see the maximum traffic that is possible per ad group, put a very large bid, such as $100, into the bid box, so that you can see all the potential traffic. If you want to see the estimated traffic by ad group for a specific bid, you can either enter a bid or click into the graph, and the tool will show you where your bid falls on the graph (Figure 3.25) as well as the estimated traffic per ad group.
If all of the keywords you added require a very low bid, then you might not receive any impressions because your bids might be below first-page bids (the minimum amount you must bid for your ad to be displayed on page one of the search results). In that case, you can either add all the keywords to your account, knowing that many might not get impressions, and see what actually happens or remove some of your keywords or ad groups until you find a nice balance between your budget and the potential traffic those keywords will bring you. One thing to keep in mind is that this tool does not access your real Quality Score data, and therefore average CPC and position are only rough estimates. You should use your common sense and the historical information you have learned about your industry to determine how useful those two numbers are to your specific account. It is common to see the actual data from an account not exactly match the estimates. Usually, if you are estimating at a country level, then the data is generally (and there are many exceptions) within 10 to 20 percent of what you actually see once the words are live. If you are estimating at a city level (meaning your targeting includes only a city and not an entire country), then it is common for the tool to underestimate your traffic by 200 to 500 percent. Within this screen, you can view the data by ad group or by keyword. You can also add and remove ad groups or change your targeting.
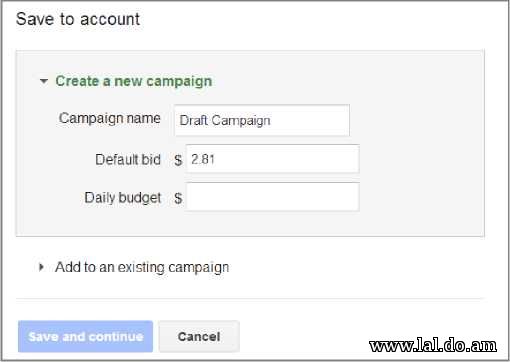
Once you are satisfied with the estimated bids, then you can either download the data or save the data to an existing or new campaign (Figure 3.26).
Figure 3.26 Saving the data to a new campaign When you save the data to a new or existing campaign, be aware that you can specify only one bid, and that bid will apply to every new ad group you are creating. We will cover determining initial bids and setting bids in much more detail in Chapter 13, “Devising Profitable Bid Strategies”; however, if you do want to use very different bids by ad group, it is useful to save your data and estimates through the download option so that once you save the ad groups to your account, you can quickly change the starting bids to your desired amounts. Using the Keyword Planner tool should make it easy to find new ad groups, populate those ad groups with keywords, and then determine costs and starting CPCs in one easy tool. While this process is simple, do not be afraid to create much more granular ad groups than the tool suggests. Feel free to download the data into a spreadsheet program, manipulate the organization and match types, and then use the AdWords Editor to create your new ad groups. The tool is a good starting place and is great for new advertisers, but more seasoned advertisers will use it as a research tool and then manipulate the data before the information goes live in an account. AdWords Keyword Planner vs. Third-Party Keyword Tools Many keyword tools are available that can help you learn more about your keywords. The most popular, and one of the original keyword tools, is Wordtracker. Wordtracker draws its data from a few metasearch engines, such as Dogpile .com. These meta-engines did have decent search volume years ago when pay-per-click (PPC) was new. However, they make up a minuscule amount of the search volume. Wordtracker takes the data it receives from these engines and extrapolates the numbers to determine search volume. Estimating search volume from such a small data set often creates a significant difference in the suggested search volume versus the impression you receive when you advertise on those same keywords. Other popular tools include WordStream, SEMrush, iSpionage, and KeywordSpy, among others. These tools draw data from a variety of sources and attempt to estimate search volume. Because Google accounts for roughly 70 percent of all search volume in the United States (and higher in many European countries), it is often best to rely on Google’s numbers to estimate traffic. If you are doing some advanced calculations, you can use multiple data sets together to attempt to determine search numbers. However, that does not mean that these other tools are useless. Quite the contrary—when you are doing specific research into wide and deep keywords, they have some nice features that help you dig into your keyword lists. They are useful for keyword research and are tools I use on occasion—just be careful of the search volume numbers. Several of these tools have free trials. This makes it easy to test their keyword research capabilities to see if they work for you before committing any money. © Advanced Google Adwords: 3rd edition >>> Back to TABLE OF CONTENTS <<< | |
| Views: 576 | |


| Total comments: 0 | |